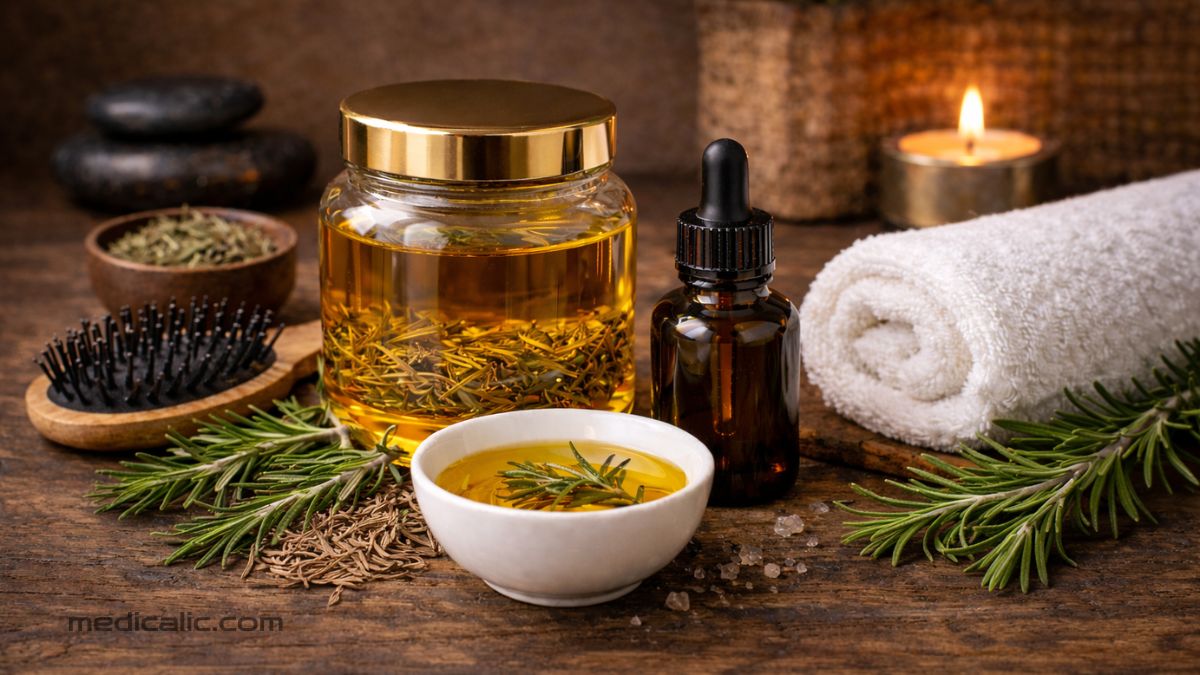
Rosemary oil has become incredibly popular for it’s potential to support hair growth and improve scalp health. Some clinical studies have shown that regular use may offer results comparable to low-strength minoxidil for people dealing with androgenetic alopecia (pattern hair loss). It is believed to work by boosting blood circulation to the scalp and helping reduce inflammation.
If you’re ready to begin or continue your natural hair care journey, homemade rosemary oil is a fantastic addition to your routine. Making your own rosemary oil for hair growth at home is simple, affordable, and truly rewarding. This easy step-by-step guide will walk you through everything so you can create a beautiful, fragrant oil that your hair will love.
Get ready to fall in love with this fragrant, nourishing treat for your locks!
Fresh vs. Dried Rosemary: Which Works Best for Hair Oil?
Both fresh and dried rosemary can create wonderful rosemary oil, but they each have their own strengths.
Fresh rosemary brings a bright, vibrant aroma and a lively feel that many people love. However, because it naturally contains moisture, it needs to be washed and completely dried before use to prevent mold from developing in the oil.
Dried rosemary is incredibly convenient, has a longer shelf life, and is much easier and safer to work with. Since it has very little moisture, it lowers the risk of spoilage and gives you more consistent, reliable results.
Quick tip: Start with dried rosemary. It reduces the risk of mold, gives reliable results, and is the easiest option when you’re just getting started with homemade rosemary oil for hair growth.
Best Carrier Oils for Rosemary Hair Oil
The carrier oil you choose plays a big role in how your finished rosemary oil feels and works on your hair. Here are the top carrier oils that work wonderfully with rosemary:
- Coconut oil: Lightweight, melts easily at body temperature, and absorbs quickly. It’s a favorite for most hair types, especially fine to normal hair.
- Olive oil: Rich in natural nutrients and antioxidants, it provides deep nourishment and works beautifully on dry, coarse, or damaged hair.
- Castor oil: Thick, viscous, and highly moisturizing. It’s excellent for thicker hair or when you want extra strength and shine. It is best used when blended with lighter oils.
- Jojoba oil: Lightweight and very similar to your scalp’s natural sebum, making it excellent for balancing oil production. It works well for all hair types, including sensitive scalps.
- Argan oil: Luxurious, nutrient-rich, and fast-absorbing. It adds shine, softness, and protection. It is perfect for dry, frizzy, or color-treated hair.
- Sweet almond oil: Gentle, vitamin-rich, and soothing. It’s ideal for sensitive scalps and helps smooth frizz while providing light moisture.
Now that you’ve chosen your ingredients, let’s gather the tools.
Tools & Equipment
You don’t need any fancy equipment to make rosemary oil at home. Just a few basic, clean tools will do the job perfectly:
- Clean glass jar with a tight lid (for infusing):
This is where the magic happens! You’ll use the jar to steep the rosemary in the carrier oil so the beneficial compounds can slowly infuse. Glass is best because it doesn’t react with the oil, and the tight lid keeps air and moisture out, helping your oil stay fresh and potent for longer. - Fine mesh strainer or cheesecloth:
After the infusion is complete, you’ll need this to strain out the rosemary leaves and get a smooth, clean oil without any residue. - Dark glass dropper bottle or spray bottle (for storage):
A dark glass bottle (amber or cobalt blue) is ideal because it protects the oil from light, which can break down its beneficial properties over time.
Alternative: If you don’t have a dark glass bottle, you can use a clear glass bottle. Just make sure to store it in a cool, dark place like a cupboard, away from direct sunlight. - Measuring spoons or cups:
These help you measure the rosemary and oil in the right proportion so you get consistent strength and results every time.
How to Make Rosemary Oil
Once everything is ready, it’s time to start making your rosemary oil. Making your own rosemary oil at home is easier than you might expect. Just follow these simple steps and you’ll get a clean, fragrant, and super effective batch every single time.
Step 1: Prepare the Rosemary
If you’re using fresh rosemary, gently wash it under cool running water. Then pat it dry thoroughly with a clean towel or let it air-dry completely for several hours.
(This step is very important. Any remaining moisture can cause mold later.)
If using dried rosemary, you can skip the washing and simply ensure it’s clean and free from any dust.
Step 2: Choose and Measure Your Oil
For a perfectly balanced infusion, use a ratio of 1 part dried rosemary to 4–5 parts carrier oil. Example: 2 tablespoons of dried rosemary with ½ cup (120 ml) of carrier oil.
This ratio gives you a gentle yet effective rosemary oil without making it too strong or overpowering.
Step 3: Combine Rosemary and Oil
Place the prepared rosemary into your clean glass jar. Pour the measured carrier oil over the herbs, ensuring all the leaves are fully submerged.
Gently stir with a clean spoon to release any trapped air bubbles and help the rosemary settle evenly.
Step 4: Infuse the Oil (Two Methods)
You have two easy ways to infuse the oil. Choose the one that best fits your schedule.
Method 1: Slow Infusion (Recommended)
This is the gentlest and most effective method.
Seal the jar tightly and place it in a cool, dark spot (like a cupboard) for 2 to 4 weeks. Give the jar a gentle shake every few days.
The slow process allows the rosemary to release its natural goodness gradually, resulting in a richer and more potent oil.
Method 2: Heat Infusion (Faster Method)
Need it quicker? Use this gentle heat method.
Place the sealed jar in a small saucepan filled with 1-2 inches of water (creating a double-boiler effect). Warm on very low heat for 30-60 minutes, stirring occasionally. Never let the oil get hot enough to smoke.
Safety tip: Keep the heat extremely low and never leave the stove unattended.
Step 5: Strain the Oil
Once the infusion time is complete, strain the mixture through a fine mesh strainer or cheesecloth into a clean bowl. Gently press the rosemary leaves to extract every last drop of the fragrant oil, then discard the used herbs.
Step 6: How to Store Rosemary Oil Properl
Transfer the strained oil into a clean dark glass bottle. Label it with the preparation date.
Store it in a cool, dark cupboard away from direct sunlight and heat to keep the oil fresh and potent for as long as possible.
How to Apply Rosemary Oil for Hair Growth (Correct Way)
Now the exciting part: actually using your homemade rosemary oil!
This is where all your effort pays off, and your hair gets to enjoy the real treat.
Apply as a Scalp Massage Oil
Warm a small amount (about 1-2 teaspoons, or as needed depending on your hair length) between your palms. Apply it directly to your scalp and massage gently with your fingertips for 3-5 minutes. This helps improve circulation and allows the oil to absorb better.
How Long to Leave It On
- Leave-in method: Apply to your scalp and hair lengths, then leave it on for 30–60 minutes (or overnight if your hair tolerates it) before washing.
- Wash-off method: Use it as a pre-shampoo treatment, massage it in, and then cleanse with a mild shampoo.
Want to try a lighter option? You can also learn how to make rosemary water for hair for a simple, refreshing alternative.
How Often Should You Use It?
Start with 2-3 times per week. If your scalp feels sensitive, reduce to once or twice weekly and adjust based on how your hair responds.
Can You Customize Rosemary Oil? (Optional Add-ins)
Yes, you can easily personalize your homemade rosemary oil with a few complementary essential oils for added fragrance and extra benefits.
- Peppermint oil (just 2-3 drops): Gives a refreshing, cooling tingle that feels wonderfully invigorating on the scalp.
- Lavender oil (2-3 drops): Adds a soothing, calming scent that turns your hair care routine into a relaxing ritual.
Keep things simple. Less is more when adding essential oils. Always do a small patch test on your inner arm first and wait 24 hours to check for any reaction. Never add too many strong oils at once to avoid overwhelming your scalp.
Final Thoughts
Transform your hair care routine with the wonderful power of homemade rosemary oil for hair growth!
Go ahead and give it a try. Your hair will thank you!
One important note: It should complement, not replace, clinically proven treatments for hair loss.
Update History
Originally written by Medicalic.
Your answer helps us improve the clarity and usefulness of our health content.